Do you know that oceanic sharks have declined by 71% since 1970? Sharks make for an essential part of the marine ecosystem. They should not be killed just for fun or to satisfy one’s fishing urges. However, often sharks get caught in fishing nets, and fishermen generally, not knowing what to do with them, kill them and throw them back in the ocean. If you ever encounter such a scenario, you can ask the fisherman to give you the shark if he has no use for it. It’s better that the dead shark benefits you than going in vain.
You can preserve the skin and jaws of the shark and add them to your collection of rare items in your home. However, shark jaw cleaning is not an easy job, and you might damage the jaws if you aren’t well-versed in the process. Go on to read how you can clean shark jaws in a step-by-step manner.
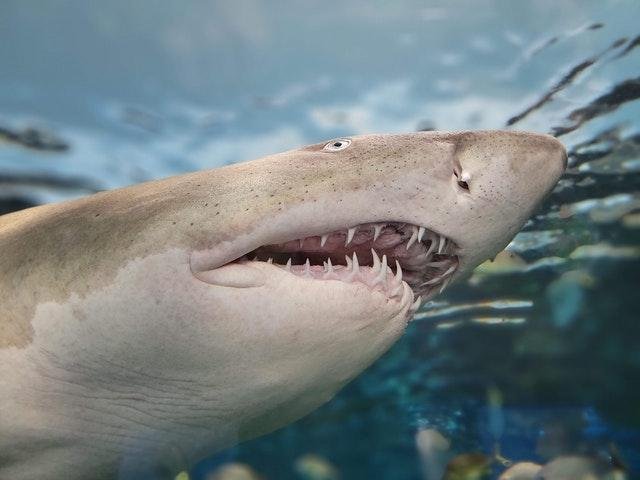
Step-by-step Guide to Shark Jaw Cleaning
- Extracting the Jaws
- To find where to cut the jaws from, trace with your finger hard along the shark’s jaws. You would find a space between the jaws and the cranium. Be sure you only cut out the flesh and not the soft jaws.
- Using a sharp knife, carefully scrape off the skin and flesh.
- Cut around the jaws and make sure you do not cut the cartilage.
- After you extract the jaws, you would have a mass of meat and skin. You can bury the rest of the head and take the jaws with you.
- Wrap the jaws in plastic bags and put them in a cooler so that they stay moist, flexible and pliable when you work on them.
- Cleaning the Front of the Jaws
- Start from the jaw extremities and carefully peel off the cheek muscles till the time the wide jaw plates get exposed .
- Once you remove the exterior, you will have to make slow and paper-thin cuts of meat and membrane over the area several times.
- After the muscle, you would find a membrane sheath that will show clear cartilage and ligaments. After removing the sheath, the cartilage would be smooth and creamy.
- While cleaning the jaw extremities, free the jaws from the skin and gums along the middle of the jaws.
- You should always start from the front of the jaws as they are the most difficult part to deflesh. Once you do that, the back of the jaws gets exposed very easily.
- Use a sharp knife against the jaws and the teeth, sliding it along the jaws towards the teeth’s back. Stop just as you reach the end of the teeth.
- Don’t continue to the hinge joint that you’d find between the two sets of jaws, as this area should be removed later.
- Follow the same technique for the other side of the jaws.
- Once you free these portions, you can cut away the strip of skin and gums and start defleshing the bottom and top sections of the jaws and expose the rest of the front.
- Cleaning the Back of the Jaws
- The back of the jaws is much smoother than the front, so you need to be careful while cleaning this portion.
- You would find a major ligament area that controls the jaws, which on being cut mistakenly, would be difficult for the jaws to mount.
- Slowly strip this jaw area until the tendon is exposed. The tendon looks like white saltwater taffy, opaque and shiny. But this tendon is not near the surface. You would see a few other tendons from the initial jaw extraction. Cut them away after ensuring they don’t hold the jaws together.
- Next, you will have to strip away the flesh on the back of the jaws. You’d find this flesh thick, but you can remove it as if you were flaying a hunted animal.
- Pull the flesh down towards the teeth and then gently scrape at the points where the flesh is attached to the cartilage. You would get a flap of skin that will stop you from reaching the gum.
- Now cut away the skin along the gum line. Start from one end of the gum line, slowly moving to the other side.
- You would be left with the jaws with the gums, hiding the teeth that root from the jaws.
- If your shark skeleton is 5-6 ft. long, the gums would be much larger; so you’d find it much easier to remove the gums around the teeth without loosening or damaging any of them.
- Using a pair of pliers, work on the gums from all sides, and they would loosen and hang out where the gums meet the back of the jawbone.
- Finally, you would be left with a patch of skin at the hinge. Start from any of the sides of the skin and remove it towards the opposite side of the jaw.
- Then wash the jaws with some clean water.
- Whitening the Jaws
- You can use either Clorox or Hydrogen Peroxide to whiten the jaws. Hydrogen Peroxide is a much-preferred choice as it is softer on hands and on the shark jaws too.
- Make a solution in the ratio of 1:3 of Hydrogen Peroxide and water, respectively.
- Soak the jaws for a day or two.
- Keep a constant check on the jaws.
- Gently scrape off if there’s still any remaining meat.
- Drying the Jaws
- Fasten the jaws with nails and string to a board and allow it to dry for some days.
- Salt the jaws a bit to prevent it from stinking.
- Sanding the Jaws
- Using a dremel and/or sanding paper, remove any tiny bits of flesh that are still there.
- You can use a soft wire bit and coarse grain sanding paper for the process.
- If required, soak the jaws again in the solution you made before for an hour to whiten them.
- Allow it to dry.
- Coating the Jaws
- Finally, coat the jaws using acrylic clear coat varnish.
- Let it dry for 30 minutes and repeat the coating if needed.
Summary
Once you are done with the cleaning, whitening and coating, you can hang up the shark jaws in your living room and add a unique value to your home.